Meringues
Get ready to whip up some serious sweetness with my mind-blowing meringue recipe! This one’s a showstopper, I’m telling ya. So imagine this: fluffy clouds of sugar, crisp on the outside, melt-in-your-mouth goodness on the inside. We’re talking pure dessert magic here, my friends.
Now, let me break it down for you. First things first, grab yourself a bunch of egg whites. Whisk those babies up until they form soft peaks, adding sugar gradually along the way. Just a tip, don’t rush it – patience is the key. Once you’ve got that velvety texture going, pile it high on a baking sheet and pop it in the oven. Trust me, the anticipation is worth it when you bite into those heavenly meringue clouds. So go ahead, give it a whirl and let the dessert dreams come true!
TIPS AND TRICKS
When making meringues for the first time, here are some handy tips and tricks to ensure sweet success:
- Clean and dry: Before you begin, make sure your mixing bowl and beaters are squeaky clean and completely dry. Any traces of grease or moisture can interfere with the meringue’s ability to form stiff peaks. You will see in the recipe that I use vinegar to make sure my bowl and whisk attachment are extra clean.
- Room temperature eggs: It’s best to use eggs at room temperature. This makes it easier to separate the yolks from the whites and allows the whites to reach their maximum volume when whipped. If you forget to take your eggs out of the fridge ahead of time, that’s okay. Just fill a bowl with lukewarm water and let your eggs sit in the water for a few minutes.
- Gradually add sugar: When adding sugar to the whipped egg whites, do it gradually. Adding it all at once can deflate the mixture. Slowly sprinkle the sugar while continuously beating until you achieve a glossy and stiff consistency.
- Low and slow: Bake the meringues at a low temperature for a longer period of time. This gentle heat allows the meringues to dry out and become crisp without browning or burning.
- Cooling time: Once the meringues are done baking, let them cool completely in the oven before eating them. This helps them firm up and prevents them from sticking or collapsing.
- Storage: Store the cooled meringues in an airtight container at room temperature. They are best enjoyed within a few days to maintain their texture and flavor.
Remember, practice makes perfect! Don’t be discouraged if your first batch doesn’t turn out exactly as planned. Experiment, learn from each attempt, and soon you’ll be whipping up impressive meringues like a pro!
WHAT SHOULD I DO WITH THE EGG YOLKS?
There are plenty of creative and delicious ways to put those golden yolks to good use. Here are a few ideas:
- Creamy custards and puddings: Whip up a velvety smooth custard or a luscious pudding. From classic vanilla and chocolate to exotic flavors like lemon or coconut, there’s a custard or pudding recipe out there to satisfy every sweet tooth.
- Homemade mayonnaise: Take your sandwich game to the next level by making your own homemade mayonnaise. Whisk together egg yolks, mustard, lemon juice, and slowly drizzle in some oil until you have a creamy and flavorful mayo.
- Rich sauces and dressings: Use those yolks to create luxurious and flavorful sauces and dressings. Hollandaise sauce, aioli, or even a tangy Caesar salad dressing are just a few examples of what you can whip up using egg yolks as a base.
- Fresh pasta: If you’re feeling adventurous, try your hand at making fresh pasta. Many pasta recipes call for a combination of whole eggs and egg yolks, resulting in a rich and tender pasta dough that will elevate your homemade pasta dishes to a whole new level.
So, don’t toss those leftover egg yolks! Get creative in the kitchen and make the most out of them with these delicious ideas.
HOW SHOULD I SERVE MY MERINGUES?
There are endless possibilities when it comes to serving meringues, so let me give you a few drool-worthy ideas to get those creative juices flowing!
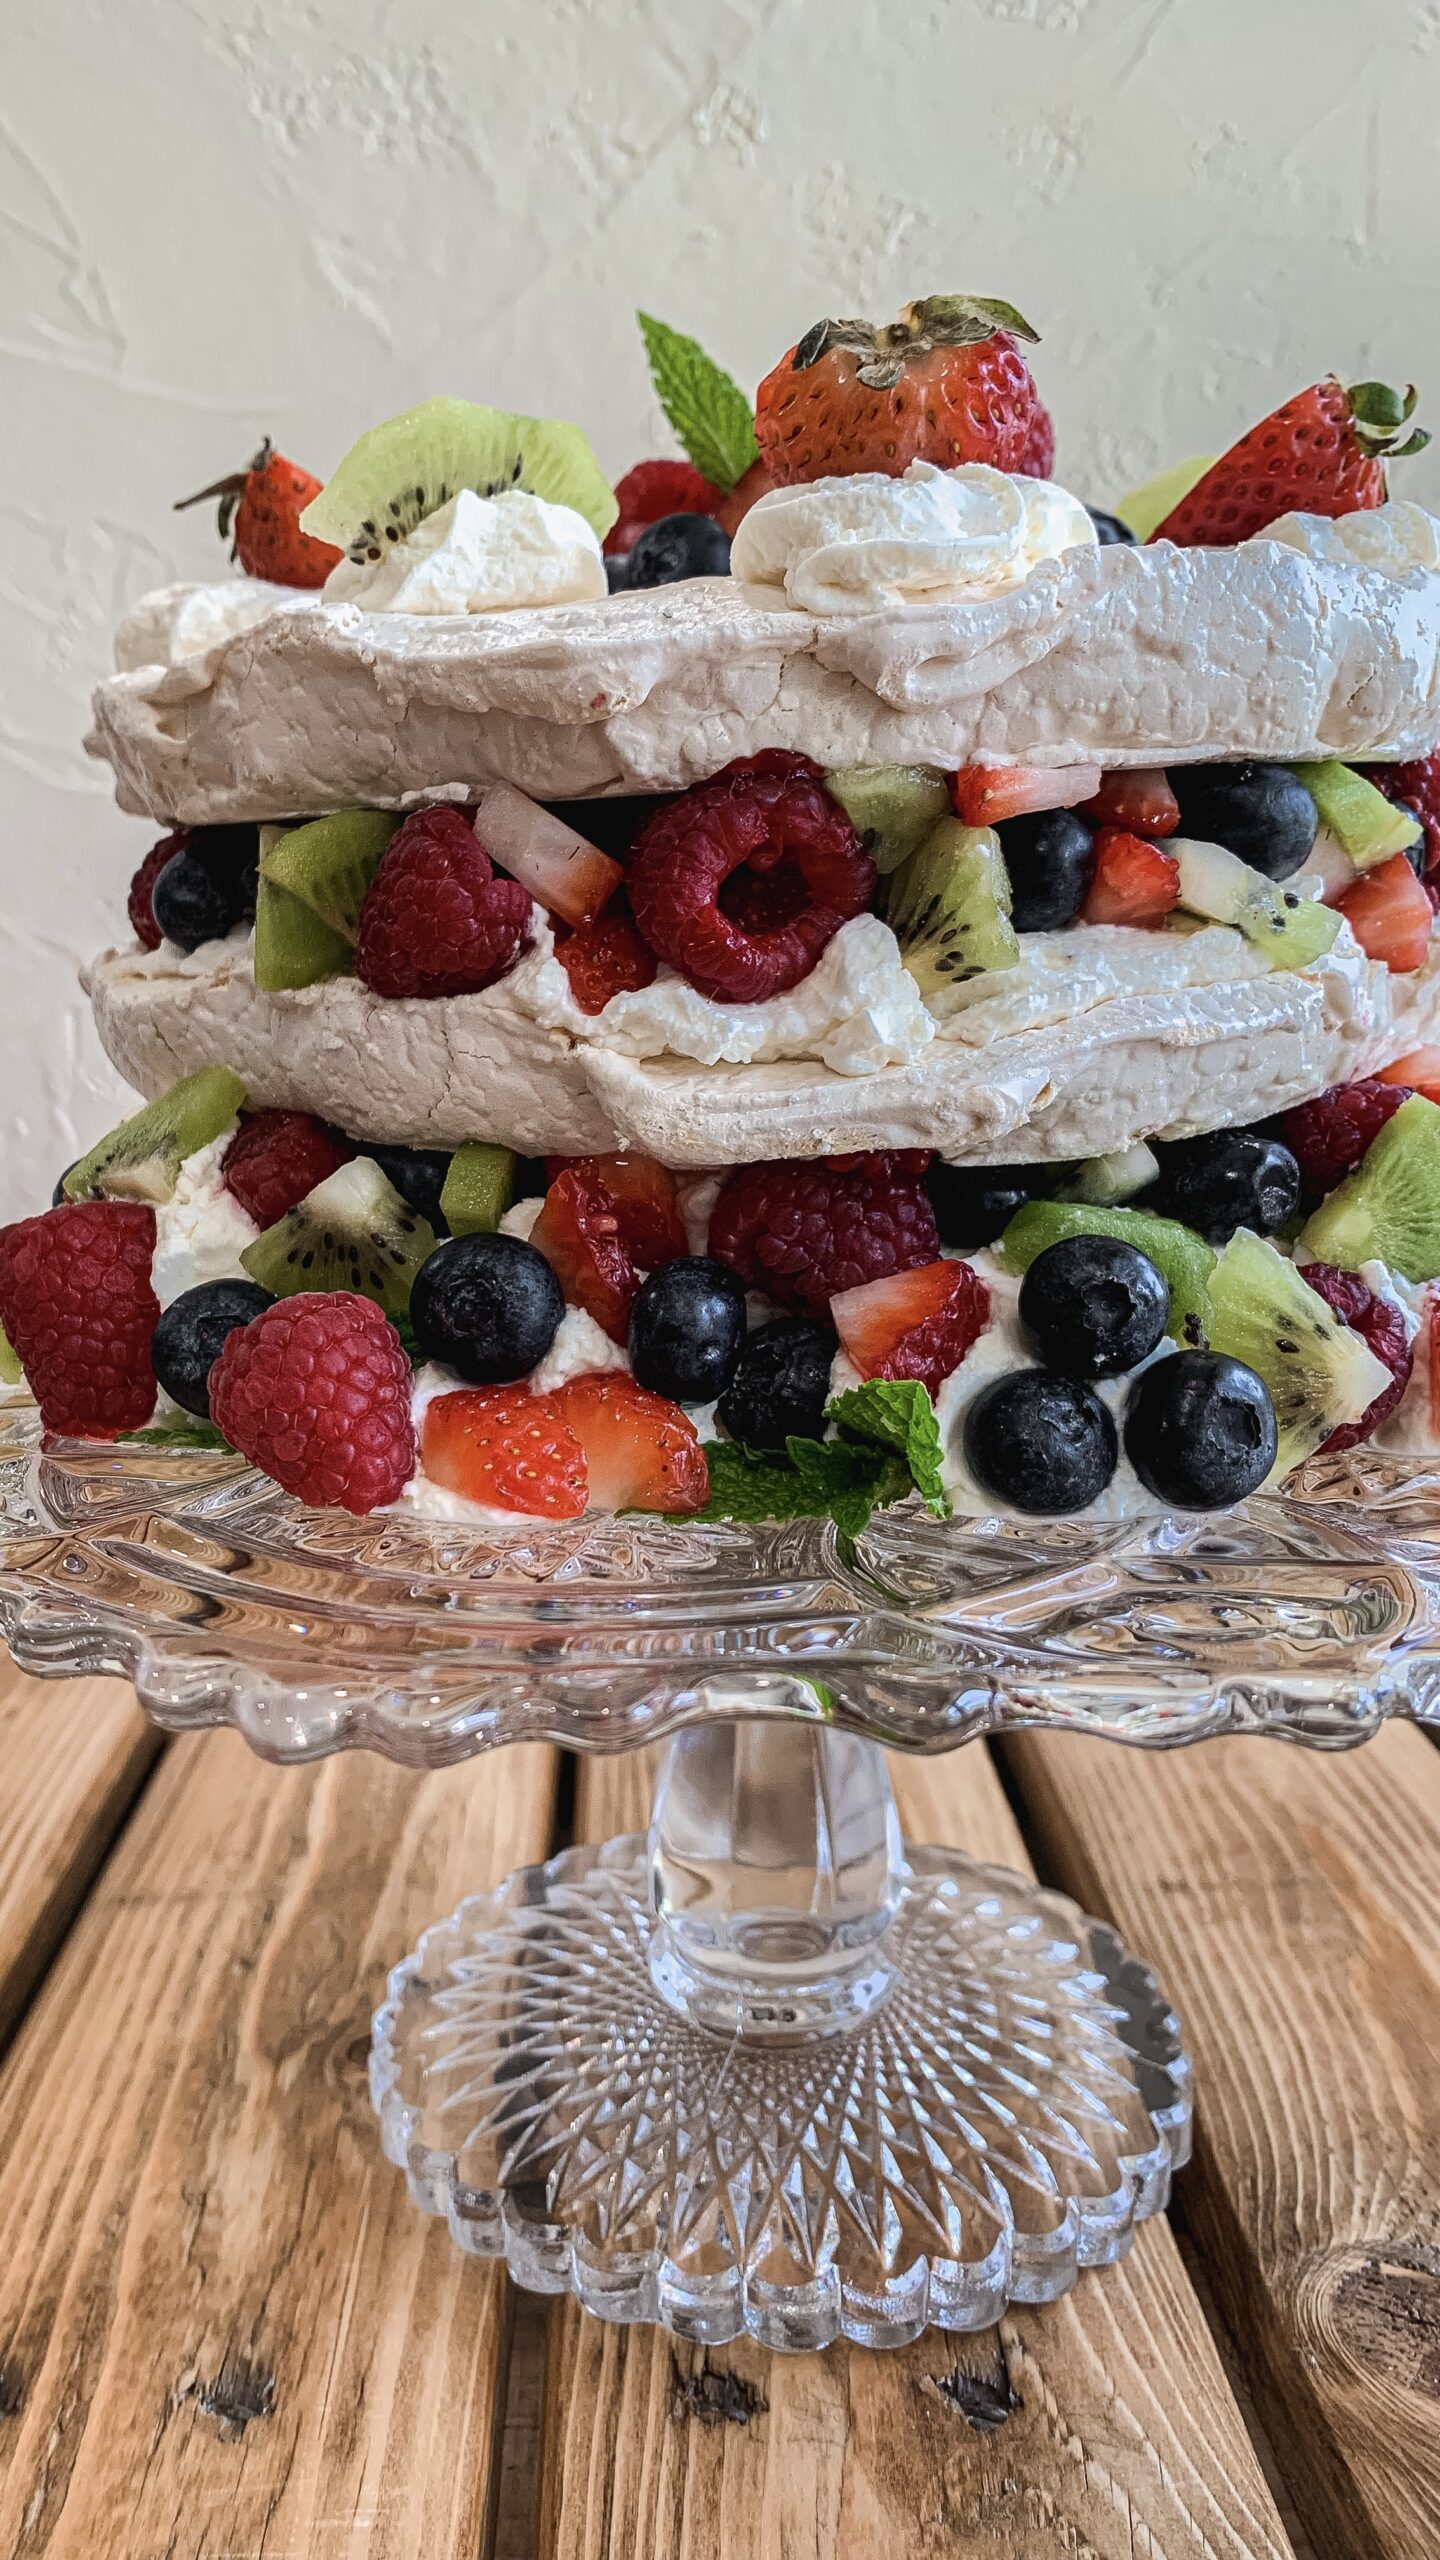
- Classic Eton Mess: Break up your meringues into bite-sized pieces and layer them with whipped cream and a generous serving of fresh berries. It’s a messy, sweet, and fruity delight that will have your taste buds doing a happy dance.
- Pavlova Perfection: Create a stunning pavlova by shaping your meringue into a nest-like base. Fill it with a luscious combination of whipped cream and your favorite fruits. Think juicy berries, tangy passion fruit, or even tropical mango slices. It’s a dessert that’s as beautiful as it is delicious.
- Ice Cream Sandwiches: Take your meringues to the next level by turning them into the ultimate ice cream sandwich. Simply sandwich a scoop of your favorite ice cream between two meringue discs. You can even roll the edges in crushed nuts or chocolate chips for an extra indulgent touch.
- Individual Elegance: Make individual meringue nests and fill each one with a spoonful of lemon curd, a dollop of whipped cream, or a combination of both. Top it off with a sprinkle of fresh mint or a dusting of cocoa powder for an elegant and sophisticated dessert.
Remember, meringues are versatile, so don’t be afraid to let your imagination run wild. From layering them in trifles to using them as decorative touches on cakes, there’s no limit to the deliciousness you can create with these delightful treats. Enjoy!
MASCARPONE WHIPPED CREAM RECIPE


Meringues
Ingredients
- 6 egg whites room temperature
- 1 ½ cup sugar
- 1 tsp vanilla
- ¼ tsp salt
- 1 tsp white vinegar
Instructions
- Preheat the oven to 215°F.
- PREP: Add the white vinegar to the bowl of the stand mixer. Using a paper towel, wipe out the bowl making sure to spread the vinegar all around the bowl to remove any excess grease that may have been left behind from prior use. Wipe down the whisk attachment using whatever is left on the paper towel. Be sure there isn’t any excess vinegar left in the bottom of the bowl before moving on to the next step.
- BEAT: In the same bowl, add the egg whites and beat on a medium-low speed for a minute. Add the vanilla and salt, and then continue to beat until the mixture begins to foam.
- Once the mixture begins to foam, raise the speed to medium-high and SLOWLY and GRADUALLY add the sugar a little at a time. Continue to beat the mixture as you add the sugar. Beat the meringues until it reaches stiff peaks. Stiff peaks are when the bowl can be held upside down and the meringues will not fall out. You can also check for stiff peaks by taking the whisk off and holding it upside down as well. Take a small amount of the mixture and rub it between your fingers to check to see if all the sugar is dissolved. If the mixture feels gritty, then beat it for longer.
- BAKE: After the meringues have reached stiff peaks, transfer them to a parchment paper lined sheet pan. Use a piping bag or offset spatula to create whatever shape you want. Bake the meringues for 1-2 hours depending on the size. For small meringues cookies, bake for 60 minutes. For large pavlovas, bake for 2 hours. Do not open the oven while the meringues are baking!
- COOL: Once the meringues are finished baking, turn the oven off and leave them in the oven to cool slowly. You will want to give the meringues at least 2-3 hours to cool.
- SERVE: Serve the meringues plain or topped with whipped cream and fresh berries.