Papou’s Chickpeas in Tomato

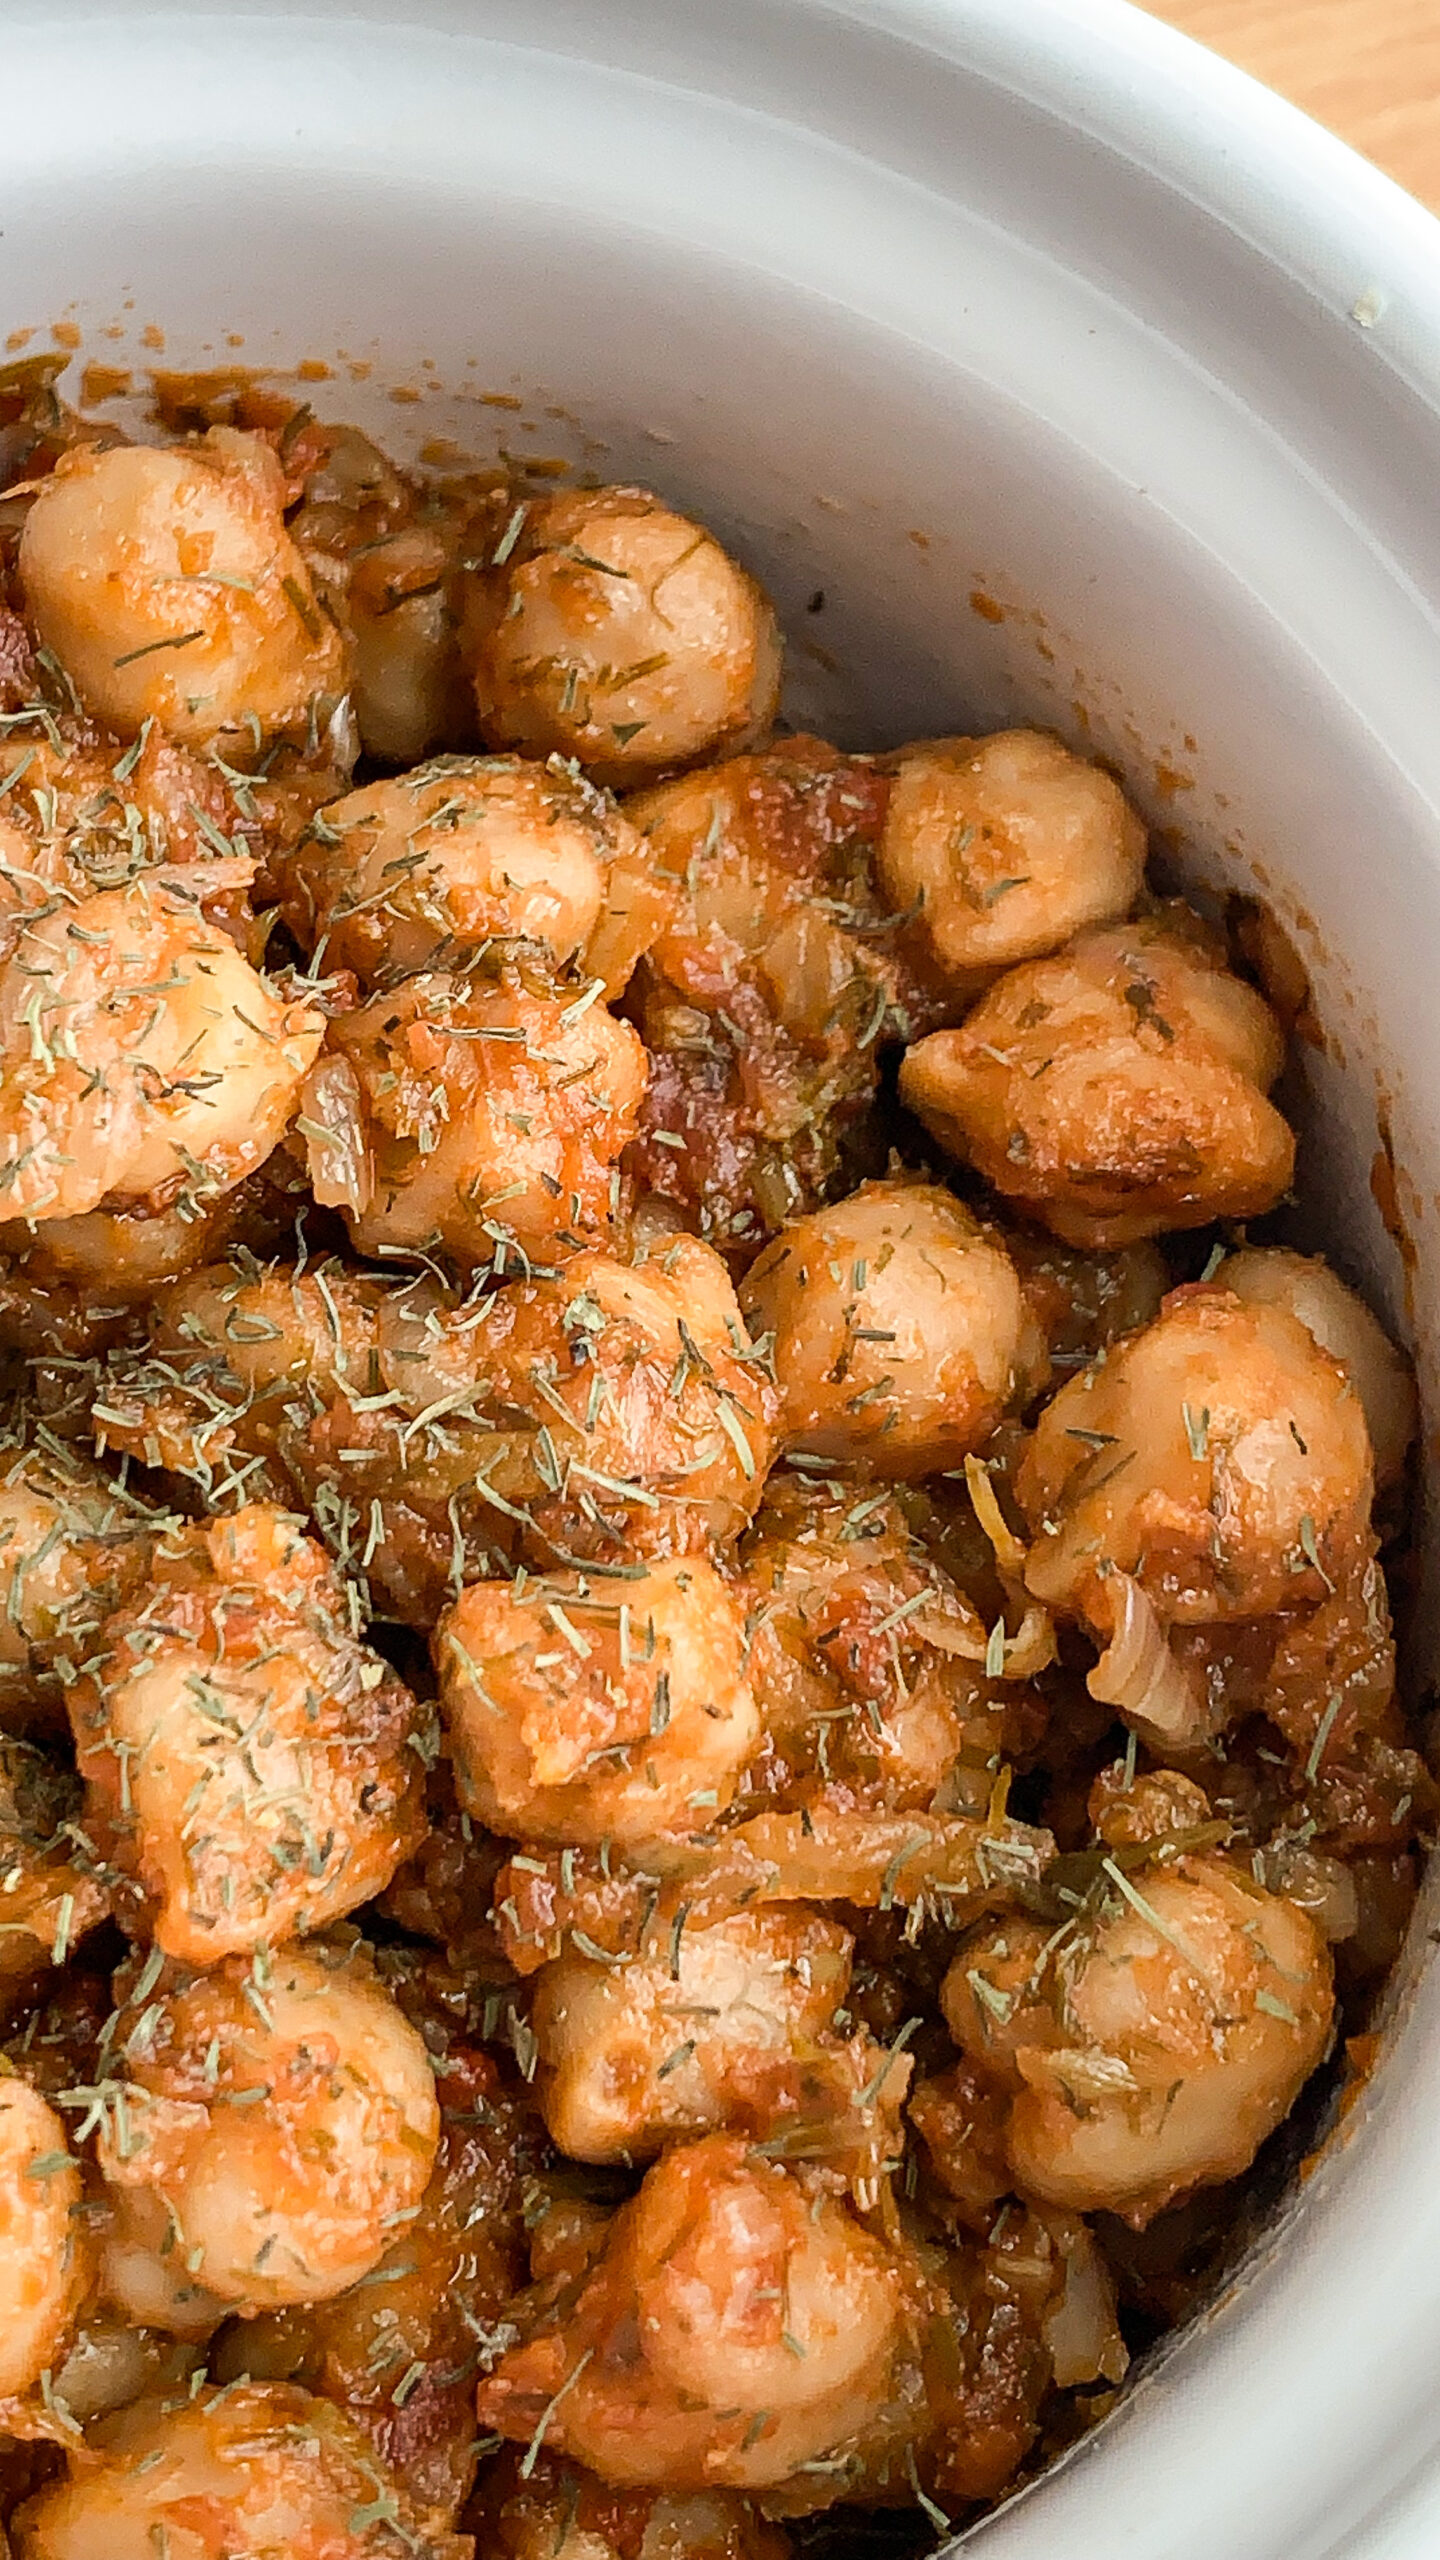
Picture this: a steaming pot filled with plump chickpeas, lovingly simmered in a rich tomato sauce infused with aromatic spices. This is my Papou’s recipe, and it’s a dish that he made so many times. Its beauty lies in its simplicity, yet the flavors are nothing short of extraordinary. This dish is a versatile delight, capable of complementing a wide array of dishes and transforming them into culinary adventures. From pairing gracefully with fluffy rice to nestling comfortably in pita bread or serving as the perfect sidekick to grilled meats, these chickpeas are a testament to the timeless wisdom of my Papou’s kitchen.
CANNED VS. DRIED CHICKPEAS
1. Preparation Time:
- Canned: Canned are pre-cooked and ready to use right out of the can, significantly reducing preparation time.
- Dried: Dried require soaking for several hours or overnight before cooking, which adds a considerable amount of prep time.
2. Texture:
- Canned: Canned tend to be softer and have a creamier texture compared to dried chickpeas.
- Dried: Dried, when cooked properly, can have a firmer texture and a slightly nuttier flavor.
3. Nutritional Value:
- Canned: Canned may lose some of their nutrients during the canning process, but they still retain a good amount of protein, fiber, and vitamins.
- Dried: Dried, when cooked from scratch, often have a slightly higher nutritional value because they haven’t undergone the canning process. They are an excellent source of plant-based protein, fiber, folate, iron, and other essential nutrients.
4. Sodium Content:
- Canned: Canned can contain added salt for preservation, so they may have a higher sodium content. You can mitigate this by rinsing them thoroughly before use.
- Dried: Dried typically have no added salt, allowing you to control the sodium content during cooking.
5. Cost:
- Canned: Canned are convenient but often slightly more expensive than dried chickpeas on a per-pound basis.
- Dried: Dried are usually more budget-friendly, but they require more time and effort in preparation.
6. Flavor Control:
- Canned: Canned come with a pre-cooked flavor profile that may not be suitable for all dishes. However, they can be convenient for quick recipes.
- Dried: Cooking dried from scratch allows you to infuse them with flavors and seasonings that suit your recipe, giving you greater control over taste.
In summary, the choice between canned chickpeas and dried chickpeas depends on your cooking preferences and time constraints. Canned chickpeas offer convenience but may have slightly different texture and flavor characteristics. Dried chickpeas provide more control over the cooking process and may be favored for certain dishes, especially if you’re looking for a firmer texture and maximum nutritional value.
SOAKING AND SPROUTING DRIED CHICKPEAS
Soaking:
Why?
- Reducing Phytic Acid: Dried chickpeas, like many legumes and grains, contain phytic acid, an anti-nutrient that can inhibit the absorption of minerals like iron, zinc, and calcium. Soaking helps reduce phytic acid content, making these minerals more bioavailable.
- Improving Digestibility: Soaking softens the chickpeas and breaks down complex sugars, which can make them easier to digest and reduce the likelihood of gastrointestinal discomfort.
How?
- Rinse: Start by rinsing the dried chickpeas under cold water to remove any debris.
- Soak: Place the chickpeas in a large bowl and cover them with water. Use a 2:1 ratio of water to chickpeas (two cups of water for every one cup of chickpeas).
- Add Salt (Optional): You can add a pinch of salt to the soaking water, which can enhance flavor and help soften the chickpeas further.
- Soak Time: Allow the chickpeas to soak for at least 6-8 hours or overnight. You can leave them at room temperature or refrigerate them during soaking.
- Drain and Rinse: After soaking, drain the chickpeas and rinse them thoroughly with fresh water.
Sprouting:
Why?
- Nutrient Boost: Sprouting increases the nutritional value of chickpeas. As they sprout, their nutrient content, including vitamins, minerals, and enzymes, tends to increase. For instance, vitamin C and B vitamins may become more abundant.
- Reducing Anti-Nutrients: Sprouting further reduces anti-nutrients like phytic acid and enzyme inhibitors, which can interfere with nutrient absorption.
How?
- Rinse: Rinse the soaked chickpeas once again under cold water.
- Transfer: Place the rinsed chickpeas in a clean container or jar.
- Sprout: Allow the chickpeas to sprout by keeping them in a cool, dark place. Rinse and drain them every 8-12 hours to prevent mold growth and promote sprouting. Sprouting can take 1-3 days, depending on temperature and humidity.
- Use: Once the chickpeas have sprouted to your desired length (usually about 1/4 to 1/2 inch), they are ready to use in recipes. You can cook them as you would regular chickpeas.
Incorporating soaked and sprouted chickpeas into your recipes not only boosts their nutritional value but can also enhance their flavor and make them more digestible. It’s an extra step in meal preparation that can be particularly beneficial for those looking to maximize the health benefits of chickpeas.
CHECK IT OUT!


Papou’s Chickpeas in Tomato
Ingredients
- 1 tbsp olive oil
- 1 Vidalia onion finely diced
- 4 cloves garlic minced
- 3 cups chickpeas cooked
- 1 cup tomato sauce
- 1 cup bone broth
- 3 tbsp fresh dill chopped
- Salt and Pepper to taste
Instructions
- COOK AROMATICS: Preheat a medium-sized pot on medium heat. Add the olive oil and onions. Add salt and pepper to taste. Allow onions to cook until translucent, stirring occasionally. Add the garlic and stir for about 1-2 minutes or until fragrant.
- ADD CHICKPEAS: Add the chickpeas and stir to combine. If you are using canned chickpeas, be sure to drain and rinse them before adding them to the pot.
- ADD TOMATOES: Add the tomato sauce and bone broth to the pot and stir to combine.
- SIMMER: Bring the chickpeas to a boil, then reduce the heat and allow them to simmer for 30 minutes. Be sure to stir occasionally to prevent anything from sticking or burning on the bottom of the pot.
- ADD DILL: Add the dill and stir to combine. Allow to simmer for another 5-10 minutes.
- SERVE: Serve alongside your protein of choice or use this as your protein for a plant-based meal.
