Natural Easter Egg Dye
Trying to avoid using artificial dyes? I’ve got you covered! These Easter egg dyes are all natural and non-toxic because they are made from whole-food ingredients. Simple ingredients you probably already have in your home can be used to create these vibrant and beautiful dyes for things like Easter eggs, frosting, and even clothing.
When I set out to create these natural dyes, my goal was to find a way to make vibrant red eggs that are traditional in my Greek culture. It is common in Greek families to only have red Easter eggs. These vibrant and intense red eggs represent the blood of Christ whose resurrection we celebrate on Easter.
Because these dyes are natural, you will have to leave the eggs in the dying liquid for longer than you are used to. Depending on how bright you want the colors to be, I would recommend leaving your eggs in the dye for at least 10-20 minutes. I chose to keep my eggs in the dying liquid for about 48 hours. To do so, I placed a few eggs into multiple plastic food storage containers that I was okay with throwing away if they got ruined. Then, I poured a different dying liquid into each container being sure the liquid covered the eggs completely. I placed a lid on top of each container and then left them in the fridge until the next day.
Tsougrisma:
During our celebrations, we play a game called Tsougrisma where we go around the table and attempt to crack our partner’s egg. This game continues until their is only one person left without their egg cracked and that person is believed to have good luck throughout the rest of the year. All of the egg cracking in Tsougrisma represents the tomb of Jesus Christ being unsealed or “cracked” open. Although, I couldn’t find a natural dye that created the same bright red that I am used to with the artificial dyes, I was so happy with the results I did find.
Key Ingredients:
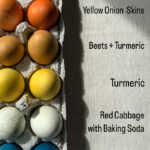
Beets: I was so incredibly surprised when I saw the eggs that were dyed in the beets because I was expecting a bright pink or red color. If you are familiar with beets, you know that just cutting them will dye your hands, cutting board, etc. so I really thought this would be a perfect way to dye eggs. Much to my surprise, it ended up being a dark brick red, almost brown color. Instead of getting rid of the beets I used from this dye, I used them to make pickled beets. If you plan on doing this as well, be sure to boil the beets until they are tender.
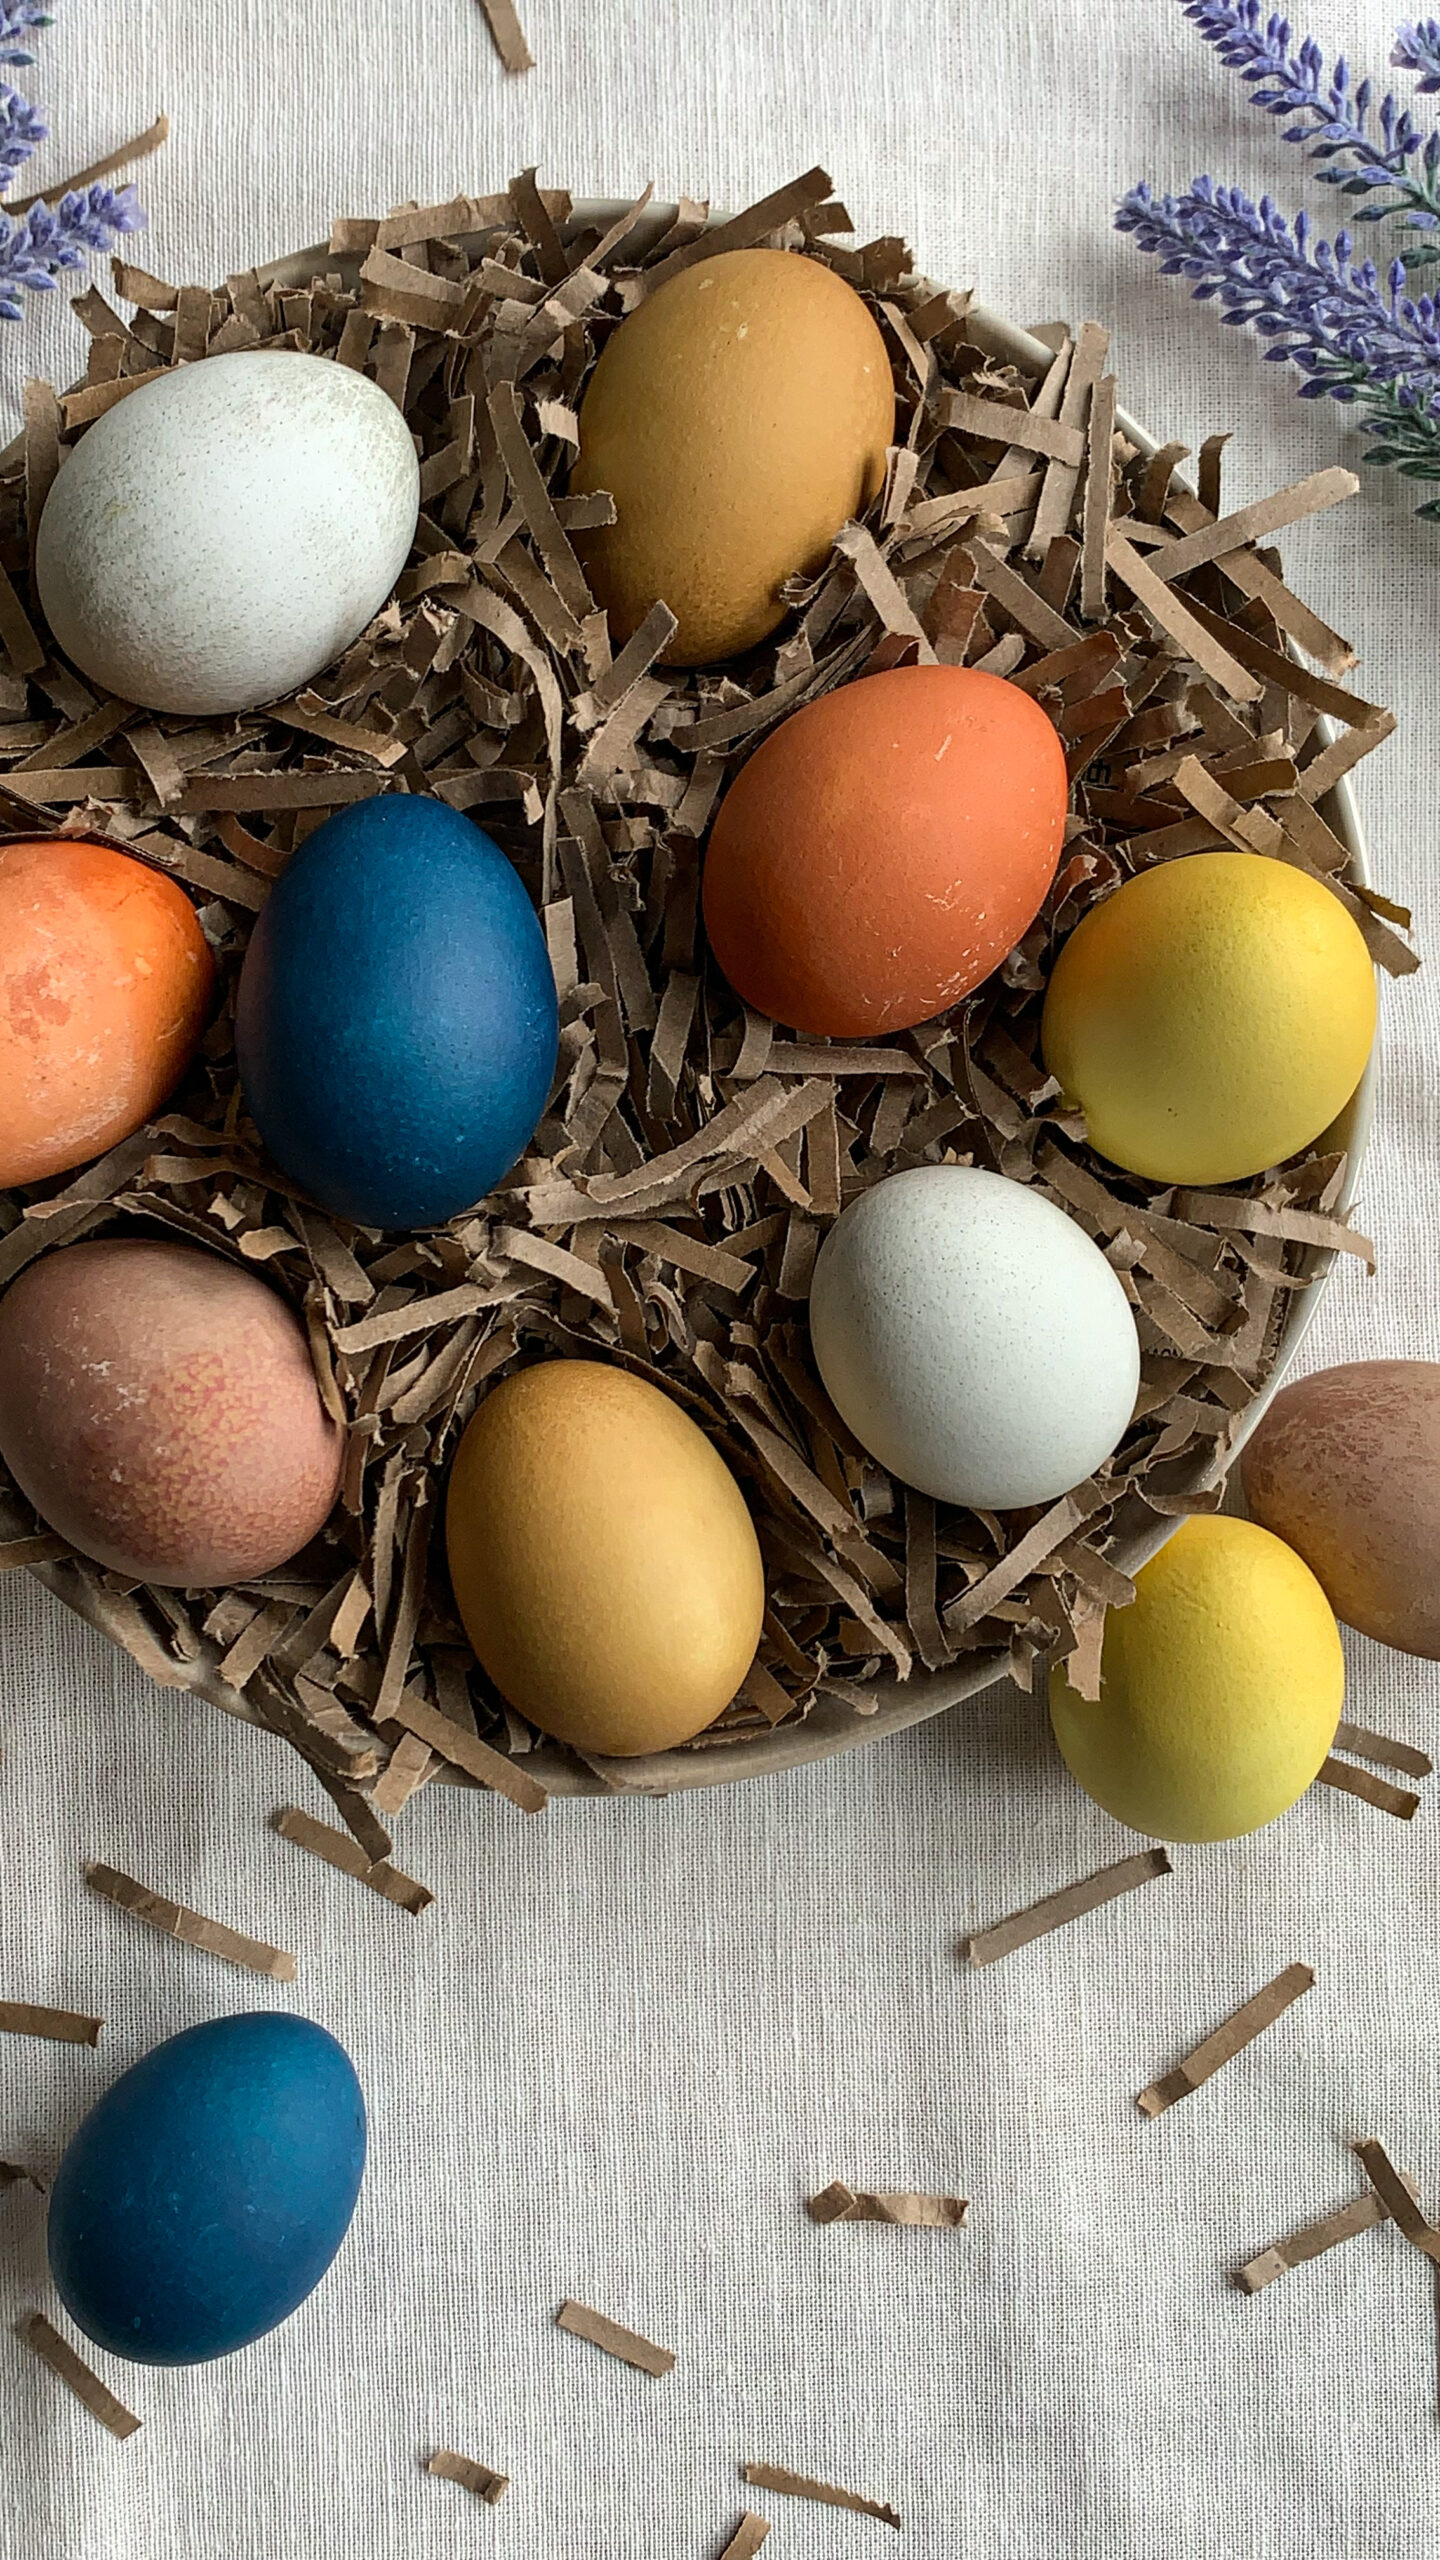
Yellow Onion Skins: This dye was incredibly shocking, as well. These onion skins that you would normally throw away created the most beautiful rusty orange color. These orange eggs probably looked the most like the artificial dyes that we are all used to.
Turmeric: Like the beets, turmeric is notorious for dying anything it touches, so it made perfect sense to use for a natural egg dye. This dying liquid created an amazing bright yellow color. Like the orange eggs, these yellow eggs looked very similar to the artificial dyes.
Purple Cabbage: Purple Cabbage has a gorgeous color on its own, so I wanted to re-create that in the dying liquid. For this, I made two separate dyes by adding vinegar to one pot and baking soda to another. The pot with the vinegar, created a vibrant indigo, blue color. This one was my favorite by far. It reminds me of the clear blue waters in Greece. The pot with the baking soda created a green dying liquid that surprised me again. Once I let the eggs sit in the dye for about 48 hours, the eggs had a speckled green look which was beautiful, but not what I was expecting.
Mix and Match:
In addition to using these dyes on their own, you can mix the dying liquids together to create your own colors. For example, I mixed the dying liquid from the beets with the turmeric. This created a stone ground mustard color which adds a really organic look compared to the vibrant yellow, orange, and blue. If I were to do this again, I would definitely skip making the purple cabbage with baking soda dye and just mix the purple cabbage with vinegar dye with the turmeric dye. I have a feeling that would create a really nice teal green color.
Comment down below and tell me how your eggs turned out!
Natural Easter Egg Dye
Ingredients
- 12 eggs
- 1 purple cabbage large
- 5 beets medium
- 5 yellow onions skins only
- 2 tbsp turmeric
- 8 tbsp white vinegar divided
- 2 tbsp baking soda
- 18 cups water
Instructions
- BOIL THE EGGS: Place the eggs in a large pot and fill the pot with enough water to be about 1 inch above the eggs(about 6 cups). Place the pot on the stove and bring to a boil. Let the eggs boil for 8 minutes. Then, using tongs place the hard boiled eggs in a large bowl with ice water and set in the fridge.
- MAKE THE GREEN DYE: Roughly chop the cabbage into 1-2 inch chunks and divide the pieces between two separate pots. In one pot, add 2 tablespoons of baking soda and fill the pot with enough water to be about 1 inch above the cabbage (about 2 cups). Set the pot on the stove and bring to a boil. Let the cabbage boil for about 10 minutes, and then remove the cabbage with a slotted spoon (can be thrown away). Set the remaining liquid aside to cool.
- MAKE THE BLUE DYE: In the other pot of cabbage, add 2 tablespoons of vinegar and fill the pot with enough water to be about 1 inch above the cabbage(about 2 cups). Set the pot on the stove and bring to a boil. Let the cabbage boil for about 10 minutes, and then remove the cabbage with a slotted spoon(can be thrown away). Set the remaining liquid aside to cool.
- MAKE THE YELLOW DYE: In a new pot, add 2 tablespoons of turmeric, 2 tablespoons of vinegar and fill the pot with about 2 cups of water. Set the pot on the stove and bring to a boil. Let the water boil for about 10 minutes, and then set aside to cool. *There will be some turmeric that has sunk to the bottom of the pot.
- MAKE THE ORANGE DYE: Peel the onions adding only the skins to a new pot. To the pot, add 2 tablespoons of vinegar and fill the pot with enough water to be about 1 inch above the onion skins(about 2 cups). Set the pot on the stove and bring to a boil. Let the skins boil for about 10 minutes, and then remove the skins with a slotted spoon (can be thrown away). Set the remaining liquid aside to cool.
- MAKE THE RED(ish) DYE: Wash and roughly chop the beets into 1-2 inch chunks. Place the beets in a pot with 2 tablespoons of vinegar and fill the pot with enough water to be about 1 inch above the beets(about 2 cups). Set the pot on the stove and bring to a boil. Let the beets boil for about 10 minutes, and then remove the beets with a slotted spoon. *If you want to use the beets to make pickled beets, boil them until they are fork tender. Set the remaining liquid aside to cool.
- BEGIN THE DYEING PROCESS: Once all of the dyes are made and have cooled, place your eggs in to the dye of your choice. The eggs must stay in the dye for 10-20 minutes to absorb the dye. The longer the eggs stay in the dye, the darker the color will be.
Notes
Follow me!
INSTAGRAM: https://www.instagram.com/thegreekgalley/?igshid=YmMyMTA2MY%3D
TIKTOK: https://www.tiktok.com/@thegreekgalley?lang=en
PINTEREST: https://www.pinterest.com/thegreekgalley/